How To Tie A Tie
Before you begin: a few friendly tips
- Mirror matters: Stand in front of a mirror and go slowly the first few times. You’ll speed up naturally.
- Dominant hand advantage: If you’re right-handed, place the wide blade on your right; left-handed, flip these instructions so your dominant hand handles the wide blade.
- Starting length: A good starting point is the narrow blade tip just above your belly button. Taller frames: start a touch higher. Shorter frames: lower.
- The dimple: That small pinch just below the knot adds polish. We’ll mention where to create it.
- Untie properly: Never yank the narrow blade to pull a knot out. Reverse the steps to protect the fabric and lining so your tie keeps its shape.

Simple Tie Knots
Easy to learn, comfortable to wear, and perfect for everyday suits and shirts.
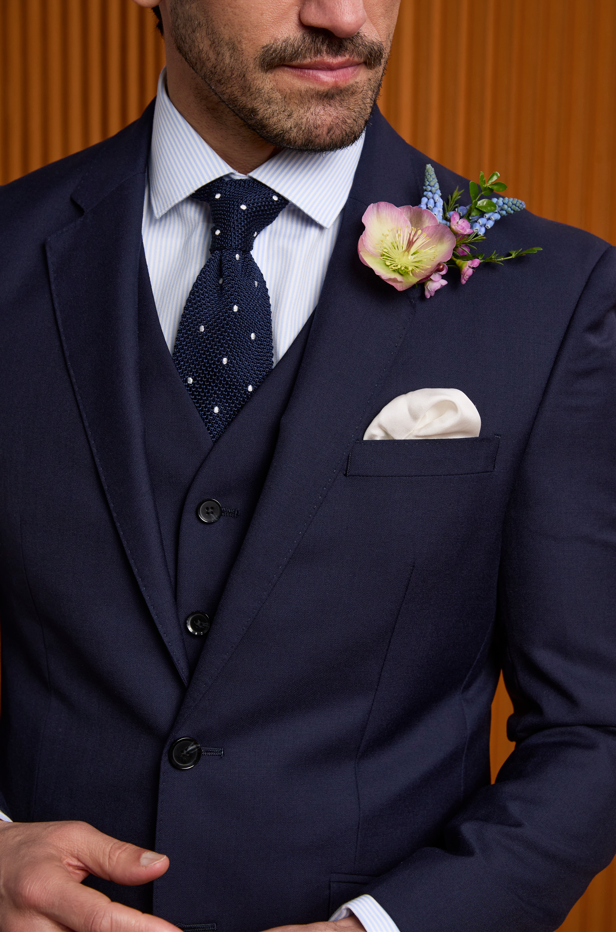
How To Tie A Simple Tie Knot
A quick, slightly asymmetric knot that preserves length, which is great if you’re tall or wearing a longer torso style. It stays put all day, but can feel a touch snug compared with the Four-in-Hand.
Best with: smooth or lightly textured ties.
Good for: narrow to standard collar spreads, everyday office wear.
Try with: plain silk or subtle stripes from our tie collection.
Steps:
-
Drape & align. Place the tie around your collar with the seams facing out on both blades. Narrow blade tip sits just above your belly button. Wide blade on your dominant-hand side.
-
Under to start. Hold the narrow blade steady at your neck. Bring the wide blade underneath the narrow blade to your non-dominant side.
-
Cross over. Bring the wide blade across the front (now seams in) back to your dominant side.
-
Up through the neck loop. Feed the wide blade up behind the neck loop at the centre.
-
Down through the front loop. Pass the wide blade down through the loop you just formed at the front.
-
Tighten & set. Pull the wide blade down to snug the knot, then slide the knot up the narrow blade to your collar. Pinch gently beneath the knot as you tighten to create a dimple.
To remove: Slide the knot back down the narrow blade, then carefully reverse each step. Don’t wrench the narrow blade through the knot — it can distort the lining.
How To Tie A Four-in-Hand Knot
Probably the world’s most popular knot: quick, forgiving, and stylishly asymmetric. Works with most collar shapes and almost any tie.
Best with: silk and grenadine, also great with knit ties for a relaxed feel.
Good for: weekday wear, interviews, business-casual.
Try with: grenadine in navy/charcoal.
Steps:
-
Drape & align. Tie around collar, seams in this time. Narrow blade tip above your belly button. Wide blade on your dominant side.
-
Across. Bring the wide blade over the narrow blade.
-
Back under. Take the wide blade behind the narrow (seams out as it wraps).
-
Across again. Bring the wide blade over the front once more, forming a loose horizontal band.
-
Up through the neck. Feed the wide blade up through the neck loop from underneath.
-
Through the front loop. Guide the wide blade down through the loop you made in front.
-
Tighten & adjust. Pull the wide blade to tighten. Slide the knot up the narrow blade to the collar. Pinch a dimple as you snug it.
Troubleshooting:
-
If the narrow blade ends up longer than the wide blade, loosen and nudge more fabric from the narrow blade through the knot; or start again with the wide blade set lower.
-
Four-in-Hand leans asymmetric by design — that’s part of its charm.
How To Tie A Half Windsor
A little more structure than Four-in-Hand, a little less bulk than Full Windsor. The result is a clean, near-symmetrical triangle with a natural dimple.
Best with: medium-weight silks, and grenadine.
Collars: classic and semi-spread.
Occasions: presentations, client meetings, weddings.
Steps:
-
Drape & align. Tie around collar with seams in on both blades. Narrow blade tip above belly button. Wide blade on your dominant side.
-
Across. Bring wide blade over the narrow.
-
Back under. Wrap the wide blade behind the narrow so the seam faces out.
-
Up and down left. Lift the wide blade up through the neck loop so you see the seam, then down to your non-dominant side (seam out).
-
Across front. Sweep the wide blade across the front to your dominant side (seam in).
-
Up through neck. Feed the wide blade up through the neck loop from underneath.
-
Down through front loop. Pass it down through the loop at the front.
-
Tighten & dimple. Pull the wide blade to snug; slide the knot up the narrow blade. Pinch a single dimple under the knot.
How To Tie A Full Windsor
Big, bold, and beautifully symmetrical. The Full Windsor creates a wider, more formal triangle, which is ideal for spread and cutaway collars, statement ties, and dressier occasions.
Best with: smooth silks, satin, and medium-weight twills.
Occasions: weddings, evening events, big presentations.
Steps:
-
Drape & align. Tie around collar, seams in. Narrow blade tip above belly button. Wide blade on your dominant side.
-
Across. Bring the wide blade over the narrow.
-
Up through neck, down left. Lift the wide blade up through the neck loop (flat side towards you), then down to your non-dominant side.
-
Behind to right. Take the wide blade behind the narrow so the seam faces out on your dominant side.
-
Up through neck, down right. Lift the wide blade again up through the neck loop (seam towards you), then down on your dominant side.
-
Across front. Sweep the wide blade across the front to your non-dominant side (seam in) forming a horizontal band.
-
Up through neck. Feed the wide blade up behind the neck loop once more (flat side out).
-
Down through front loop. Pass it down through the front loop you just formed.
-
Set & polish. Pull down to tighten, then slide the knot up. Shape a crisp single dimple with a pinch. If the triangle looks uneven, loosen slightly and smooth the wraps before snugging again.
If your result isn't the first time, take a breath, reverse, and try once more. It clicks quickly with practice.

How To Tie Advanced Tie Knots
Ready to turn heads? These statement knots weave eye-catching patterns with any ordinary tie. They’re fun and impressive, but they do take patience. They also won’t suit every occasion; they can be too bold for solemn events (some weddings, funerals). Gauge the mood, dress appropriately, and wear with confidence or not at all.
How To Tie an Eldredge Knot
Large, intricate, and unmistakably unique. The Eldredge is tied primarily with the narrow blade, creating a braided, layered effect.
Best with: plain or subtly textured ties so the pattern shows cleanly (think smooth silk, fine twill). Busy paisleys and bold stripes can fight the pattern.
Try with: plain silk or a subtle micro-texture.
Steps:
-
Drape. Tie around collar with both seams in. Place the narrow blade on your dominant side. The wide blade tip should sit just above your belt and will stay put.
-
Over to left. Bring the narrow blade over the wide blade to your non-dominant side (seam in).
-
Behind to right. Take the narrow blade behind the wide blade back to your dominant side (seam out).
-
Up & down left. Lift the narrow blade up through the neck loop (see the seam), then down to the non-dominant side (seam out).
-
Across front. Sweep the narrow blade across the front of the wide blade (still seam out).
-
Up through neck (flat), drop left. Feed it up behind the neck loop (flat side out), then drop it to your non-dominant side (seam in).
-
Under to right, form side loop. Pass the narrow blade under the wide blade to your dominant side (seam out), leaving a small side loop on the non-dominant side.
-
Back through that loop. Thread the narrow blade through the side loop you just made, pulling it up toward the collar.
-
Around back of neck loop. Wrap the narrow blade over the non-dominant side of your neck loop (away from the knot) so it emerges on that side (seam out).
-
Cross front to right. Bring it across the knot to your dominant side (seam in).
-
Tuck & finish. Slide it under the neck loop on the dominant side so it exits (seam out). Keep this pass loose to form a small front loop; now feed the narrow blade through that loop, pull gently to shape, and tuck the tail behind the neck loop.
-
Set the pattern. Smooth each wrap so the braided effect is clear. Adjust snugness gradually; don’t over-tighten one layer.
Style note: keep the shirt collar simple and let the knot do the talking.
How To Tie a Trinity Knot
Sculptural, rounded, and slightly asymmetric, the Trinity forms a three-leaf pattern. Like the Eldredge, it uses the narrow blade to build the shape.
Best with: solid colours or gentle textures (grenadine, micro-weaves).
Avoid: loud patterns that disrupt the tri-spiral.
Steps:
-
Drape. Tie around collar with both seams in. Narrow blade on your dominant side. Wide blade tip above your belt and staying put.
-
Over to left. Bring the narrow blade over the wide blade to your non-dominant side (seam in).
-
Up through neck, down left. Feed the narrow blade up under the neck loop on your non-dominant side (flat side out), then back down on that side (seam in).
-
Under to right. Take it under the knot to your dominant side (seam out).
-
Up on right, behind knot to left. Lift it up on the dominant side (see the seam), wrap it behind the knot so it comes out left (seam out).
-
Over to right again. Cross it over the wide blade to the dominant side (seam in).
-
Up through neck, down through front loop. Feed it up through the neck loop from the dominant side (flat side out), then down through the diagonal front loop you just created — keep that loop slightly loose to shape the pattern.
-
Behind to right, over horizontal, through diagonal. Take the narrow blade behind the wide blade to the dominant side (seam out), lift it over the horizontal band, then thread it through the diagonal loop.
-
Tighten & tuck. Pull the narrow blade gently up toward the non-dominant side of the neck loop to tighten the tri-leaf. Tuck the remaining tail neatly behind the neck loop.
Style note: the Trinity is a statement knot. Keep the tie plain, the suit simple, and the collar structured.
What tie is best for each knot?
The right fabric makes tying easier and the finished knot sharper.
-
Four-in-Hand (everyday): knit ties, grenadine, micro-texture, slim widths.
-
Half Windsor (polished): grenadine, fine twill, satin for events.
-
Full Windsor (bold & formal): smooth silk, satin, wider blades.
-
Eldredge / Trinity (advanced): plain silks or subtle textures so the pattern reads clearly.

How To Tie A Bow Tie
A bow tie is essential for black tie, white tie, and some weddings. You’ll need a self-tie bow (not pre-tied) to follow these steps. If you don’t have one yet, start here: bow ties. For dress codes and event styling, see our formalwear guide.
Bow tie steps:
-
Drape & level. Place the bow tie around your neck with the right blade longer by a couple of centimetres. The shiny (right) side faces out.
-
Cross & up. Cross the right (longer) blade over the left at your collar. Bring it up through the neck loop, then let it drop forward.
-
Form the bow. Fold the left blade horizontally across the collar to form the front bow shape. Hold it centred at your Adam’s apple.
-
Drape the right blade. Drop the right blade straight down over the front of the bow you’re holding.
-
Find the window. With your free hand, pinch the folded left blade to reveal the small “keyhole” behind it (right at the collar).
-
Fold & push through. Fold the hanging right blade back on itself (creating the rear bow) and push its folded middle through that keyhole behind the front bow.
-
Tighten & even. Pull the front bow’s loops with one hand and the rear bow’s loops with the other to tighten. Adjust the tails to even both sides.
Adjusting a bow tie:
-
Keep both loops level with the top of your shirt collar band.
-
Tighten in small increments, alternating front and rear loops to keep the bow centred.
-
A hint of imperfection is charming. Hand-tied bows should look alive, not stamped.

Tie FAQs
What should I do if my tie is too short or too long?
Reset and adjust your starting position. Remember: taller = start the narrow blade higher; shorter = lower.
What if my tie knot won’t sit centred?
Make sure each wrap crosses flat and stays snug before the next step.
What if I can't form a dimple with my tie?
Before the final tighten, press your thumb into the centre under the knot and pinch the sides as you slide the knot up.
What if my tie is twisting?
Check that the blade is not flipped as it passes through the neck loop; seams should face where the step calls for them.
What if I've got a gap between my tie and collar?
Tighten the knot first, then slide it up. If there’s still a gap, you may need a larger knot (Half/Full Windsor) for a wide-spread collar.
Practice makes perfect
The first few attempts might take a minute (or five). That’s normal. By the third try, your hands know where to go; by the tenth, you’ll be tying from memory. A tidy knot creates a strong first impression and quietly boosts your confidence for the day ahead.
If you need more guidance, check out our how to videos.
Find your perfect tie today. Shop our tie collection.
Read more: The Ultimate Shirt & Formalwear Guide